Do any of you remember this fun Bunny Quartet table runner from last year? It was my very first Moda Bake Shop tutorial and I’m so happy to have it out on my table again!

I’ve been wanting to make another bunny table runner, but instead of making the same exact one, I decided to change things up a bit this year. I’ve updated the bunny quilt block tutorial below (you can still find the original step-by-step photo tutorial at the Moda Bake Shop blog HERE), but I felt that the cute bunnies needed a little something extra, so I’ve added in a carrot quilt block to make a fun Easter Parade Table Runner!
You’ll have to wait until next week for the carrot quilt block tutorial, but in the meantime, you can make yourself a whole colony of rabbits using the instructions below! 😉
UPDATE: The free quilt block instructions are below, but if you’d like a printable PDF copy of the directions with fabric requirements and cutting instructions for mini quilt and throw quilt options, an Easter Parade PDF pattern is available in my Etsy shop HERE.

Cutting Instructions for One Bunny

Assembly Instructions
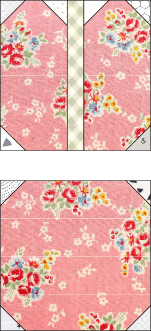
Step 1: Gather (1) A piece, (2) B pieces, and (10) C pieces. Draw a line from corner-to-corner on the wrong side of the C pieces. Lay out the pieces with the C squares placed on top of the A and B pieces, right sides together, and oriented as shown below. Sew directly on the drawn lines.

Step 2: Trim off the excess corners 1/4″ away from the lines just sewn and press the seams open.

Step 3: Gather the D piece and place it between the two bunny ears.

Step 4: Sew the D piece in between the ears. Press the seams open.

Step 5: Sew the ears to the bunny head and press the seam open. Bunny head should now measure 5″ x 9.5″.

That’s it! With only five steps, you can see that these cute bunnies go together SO quickly!
Stay tuned for the carrot quilt block tutorial next week. If you want to make sure you don’t miss it, you can follow my blog and get the blog post delivered straight to your email inbox. 🙂 Happy sewing!


Thank u for the tutorial..this is so cute!!
LikeLike
Thank you for your kind comments, Amandlee!!
LikeLike
Thanks so much for this very cute bunny pattern. I am looking forward to the tutorial for the carrot. Love it.
LikeLike
Thank you!! The carrot tutorial should be ready early next week! Yay!
LikeLike
This is so cute! Love the addition of the carrot. I made a bunny last night using the Fancy Forest pattern by Elizabeth Hartman. Not really sewing for Easter, per se’, but I just love the bunny block! The construction is similar to this, but has more detail – eyes, nose, mouth. Fun stuff! Thanks for sharing!
LikeLike
Oh, I love Elizabeth Hartman’s bunny, too!! It’s such a cute one. 🙂
LikeLike
I absolutely LOVE this and am going to have to make something with this bunny block pattern! I have two bunnies so I am a little biased.
LikeLike
Thank you so much! I love that you have some real bunnies of your very own. 🙂
LikeLike
This is such a cute bunny pattern. I can hardly wait for the carrot and what teaser you will add in with that one too.
LikeLike
Thank you, Denita! The carrot tutorial should be ready early next week, so be prepared to start sewing! 😉
LikeLike
Thanks for the great tutorial. I wasn’t going to make anything special for Easter this year but now I think I will! Cheers!
LikeLike
Thank you! I’m so glad you’ll give it a try! The bunnies are especially fast to sew together, so you’ll be done in no time. 🙂
LikeLike
This is such an adorable pattern and just makes me smile! I will definitely make one for my son and his family to have in time for next Easter…..
Is there a simple way to print out your tutorial?
LikeLike
Catherine, thank you for your kind words! I don’t have an alternative way to print out the tutorial, although thanks for giving me the idea–it’s something I’ll definitely be looking into. 🙂
LikeLike
I saw this and had a sweet little bunny block finished in les than 10 minutes thanks to a charm pack and some background fabric. Thank you! I have to hunt out some orange fabric from my stash for the carrot next.
LikeLike
I’m so happy to hear that, Ann! I love that the bunnies are so quick to put together. The carrot will only take slightly longer. 😉
LikeLike
These were so easy to make and they came out perfectly!
LikeLike