
I’m so excited to share the final block in my Spooky Parade today! For those of you just joining in, I am sharing a few Halloween themed 12″ x 12″ blocks in the weeks leading up to Halloween. They make great stand-alone mini quilts or pillow covers, or you can put the blocks together for a fun Halloween table runner. If you missed the first two Spooky Parade blocks you can click HERE for the Halloween Bats tutorial and HERE for the Jack-o-lantern block tutorial.
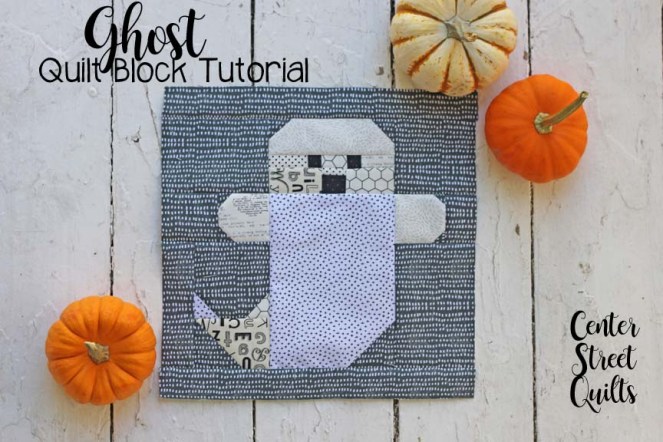
Today, I’ll be sharing a fun Ghost quilt block tutorial. I saved the ghost block for last because it has the most pieces and I didn’t want to scare you off with over 20 pieces to cut and sew for the first block. Haha! Even though the ghost has a lot of pieces, it’s a pretty straightforward block and he’s definitely worth the effort! 😉
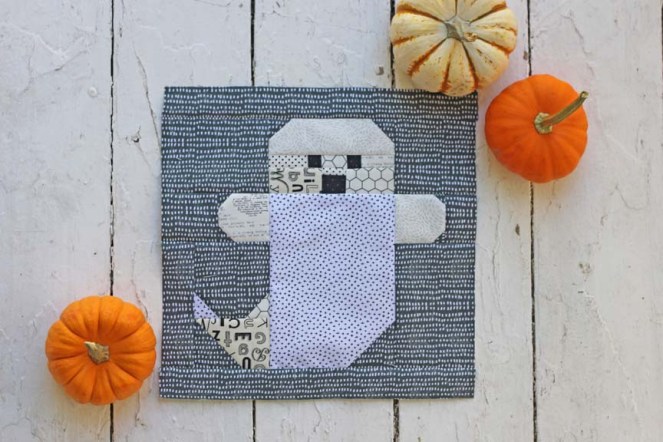
The Ghost quilt block finishes at 12″ x 12″ (12.5″ x 12.5″ unfinished). Below you’ll find a quilt block diagram, cutting instructions, and a step-by-step photo tutorial. Happy Sewing!
Spooky Parade: Ghost
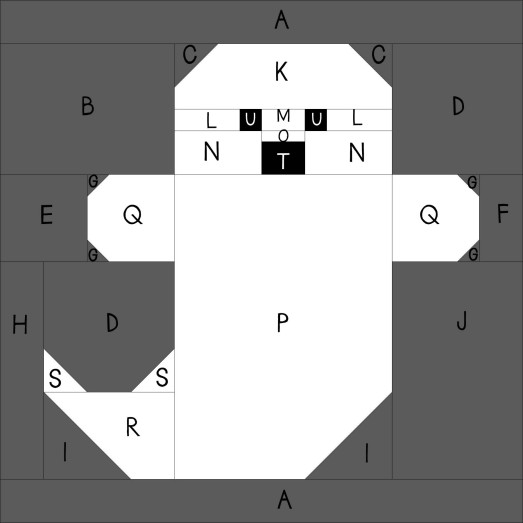
Ghost Quilt Block Diagram:
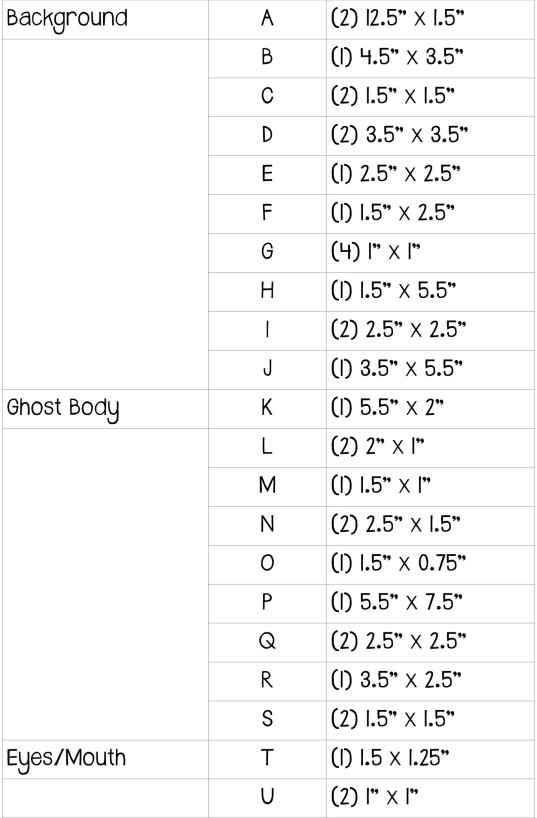
Cutting instructions for Ghost Quilt Block:
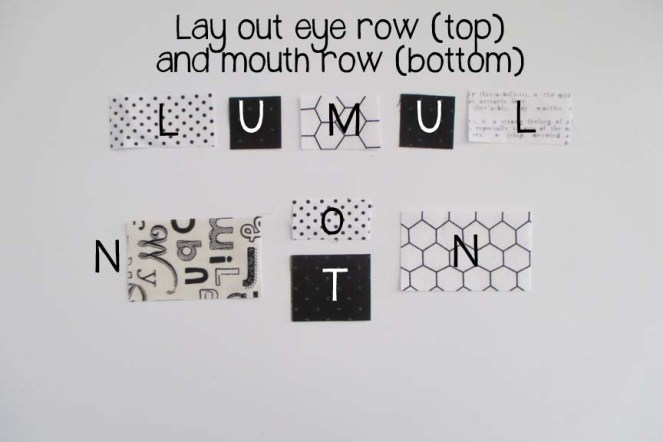
1. Gather the L. M, N, O, T, and U pieces and lay them out according to the photo below. The top row will make up the eyes and the bottom row will become the mouth.
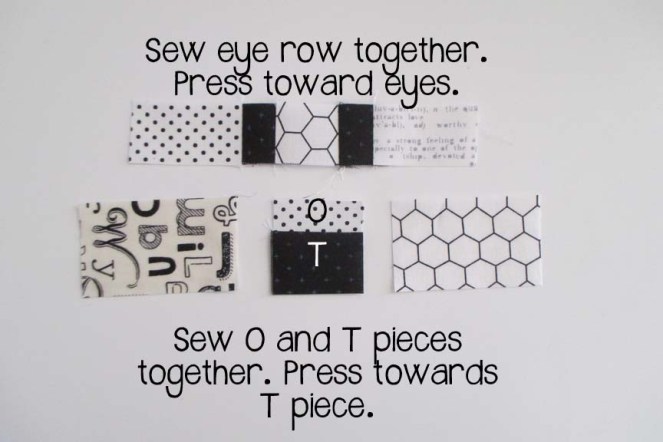
2. Sew the eye row together. Press seams toward the eyes. Sew the O and T pieces together. Press toward the T piece.
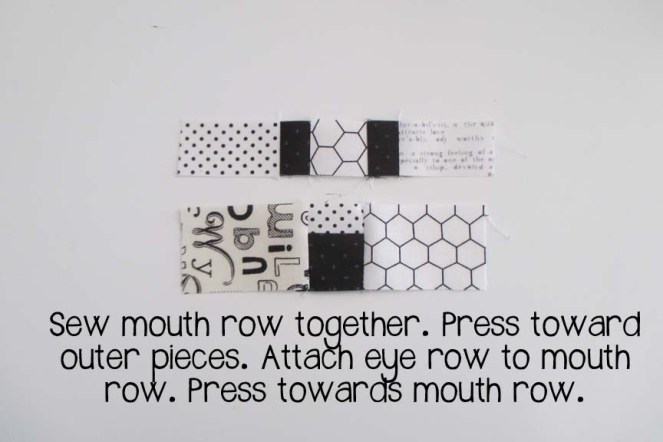
3. Sew the mouth row together. Press the seams toward the outer pieces (the N pieces). Next, sew the eye row to the mouth row. Press the seam toward the mouth row.
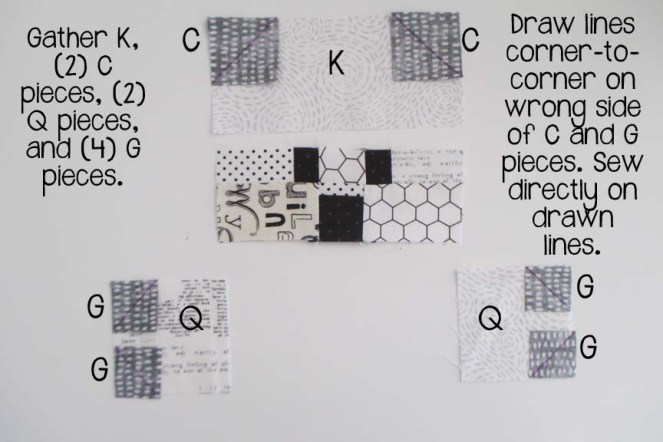
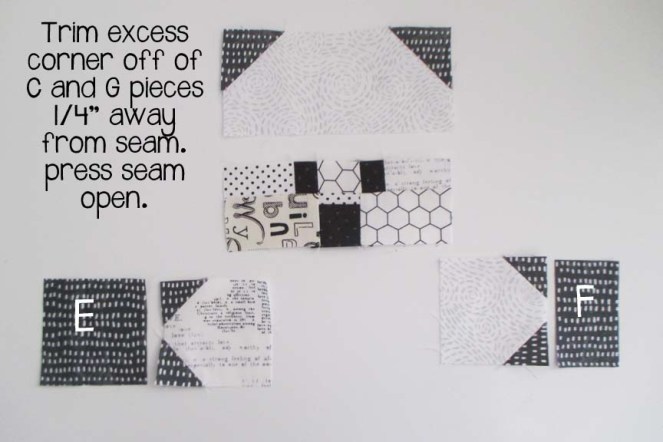
4. Gather the K piece, (2) C pieces, (2) Q pieces, and (4) G pieces. Draw a line corner-to-corner on the wrong side of the (2) C pieces and the (4) G pieces. Orient the (C) piece on the K piece as shown and the (G) pieces on the Q pieces as shown. Sew a line directly on the drawn line.
5. Trim off the excess corner 1/4″ away from the sewn line. Press the seam open.
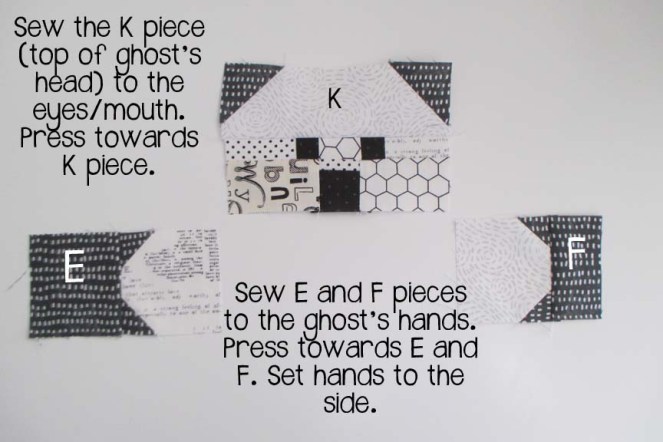
6. Sew the K piece (which is the top of the ghost’s head) to the top of the eyes/mouth unit. Press seam towards K piece. Sew the E and F pieces to the ghost’s hands. Press towards E and F pieces.
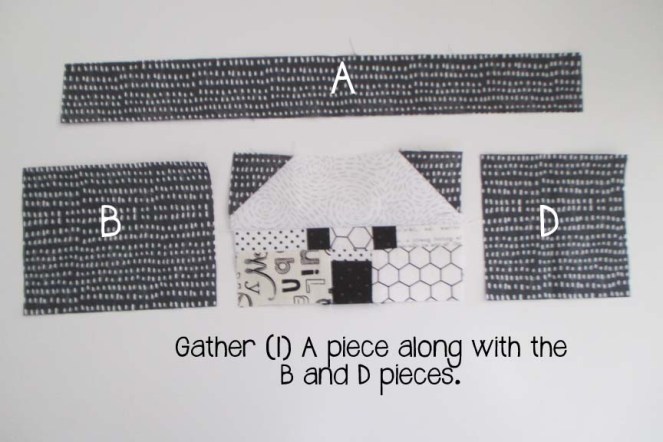
7. Gather (1) A piece along with the B and D pieces and lay them out with the ghost’s head according to the image below.
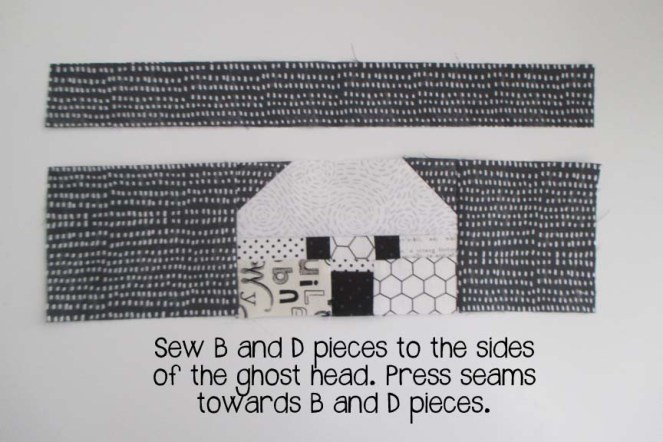
8. Sew the B and D pieces to the sides of the ghost head. Press the seams towards the B and D pieces (away from the ghost head).
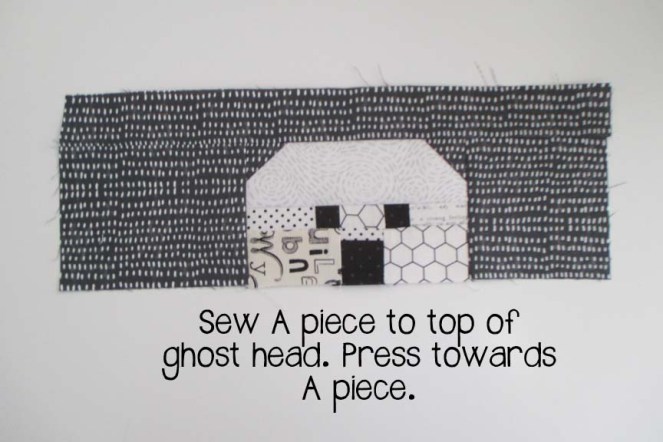
9. Sew the A piece to the top of the ghost’s head. Press towards the A piece.
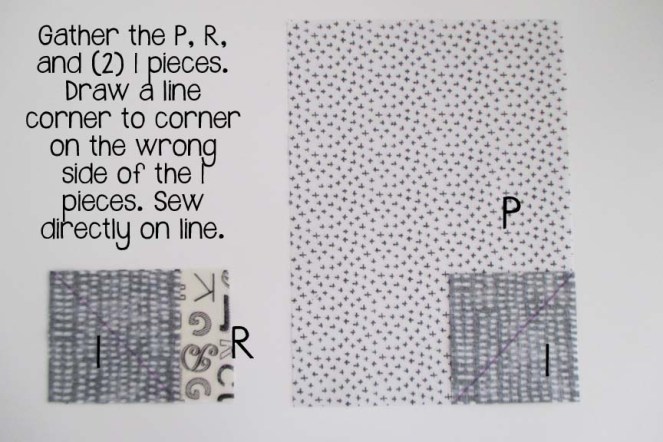
10. Gather the P, R, and (2) I pieces. Draw a line corner-to-corner on the wrong side of the I pieces and orient them on the P and R pieces as shown in the image below. Sew directly on the drawn line.
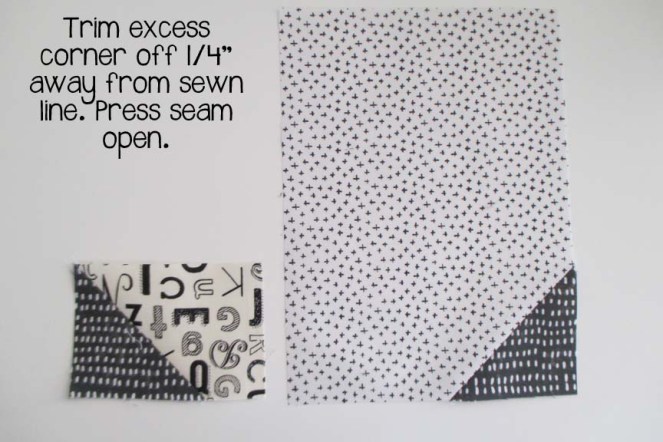
11. Trim off the excess corner 1/4″ away from the sewn line. Press the seam open.
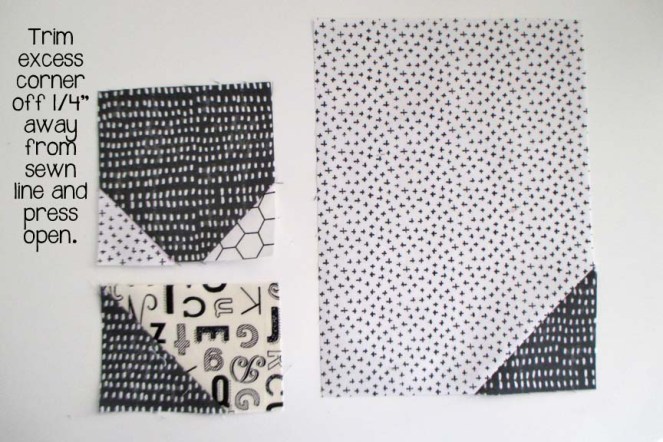
12. Gather the D piece and the (2) S pieces. Draw a line corner to corner on both S pieces and orient them on the bottom of the D piece as shown in the image below. Sew directly on the drawn line.

13. Trim off the excess corner 1/4″ away from the sewn line and press the seam open.
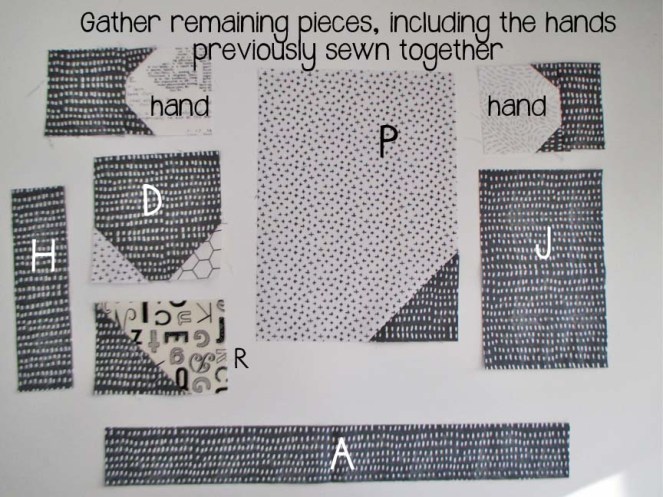
14. Gather the remaining pieces, including the hands previously sewn together. Lay out all the pieces according to the image below.
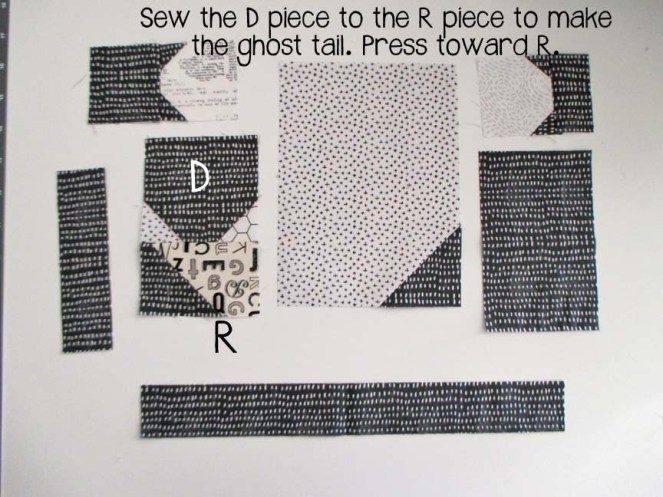
15. Sew the D piece to the R piece to make the ghost’s tail. Press toward the R piece.
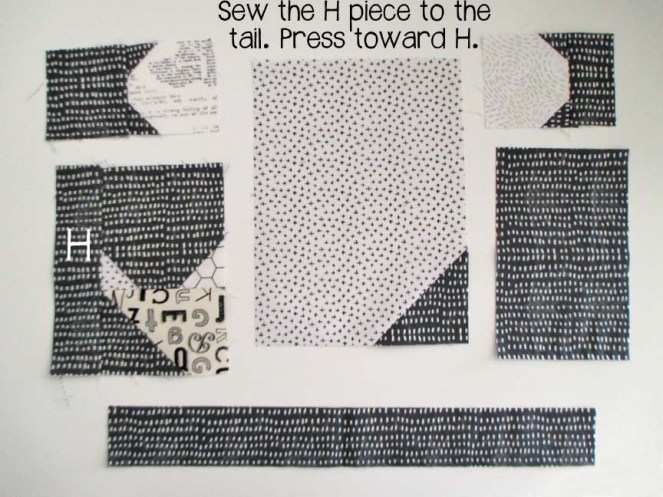
16. Sew the H piece to the side of the tail. Press toward the H piece.
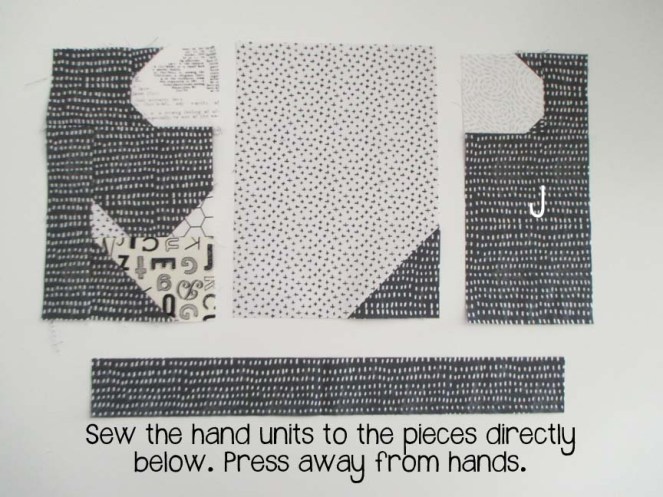
17. Sew the hand units to the pieces directly below them. Press seams away from the hand units.
18. Sew the side units to the ghost body. Press towards the ghost body. Sew the A piece to the bottom of the ghost. Press toward the A piece.

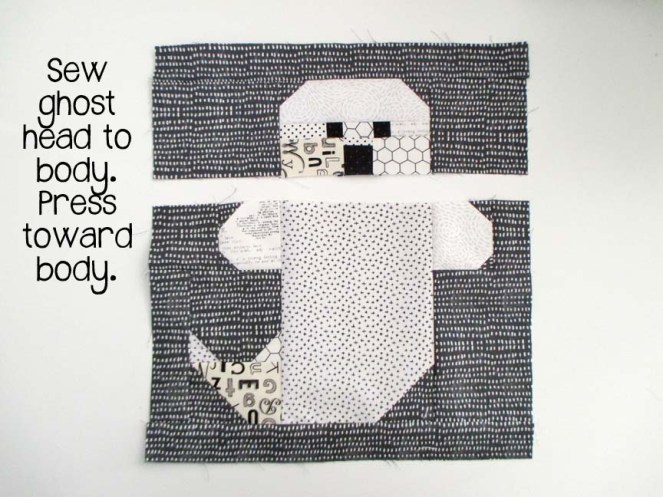
19. Sew the ghost head to the ghost body. Press toward the ghost body.
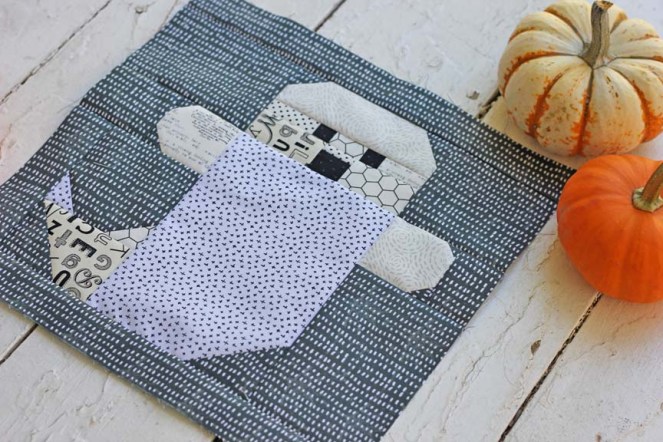
20. Your ghost block is finished! It should measure 12.5″ x 12.5″
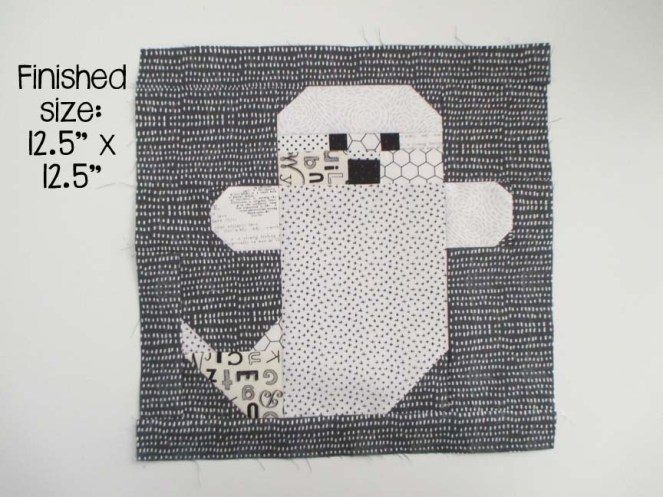
Isn’t he (she?) a cute little ghost?
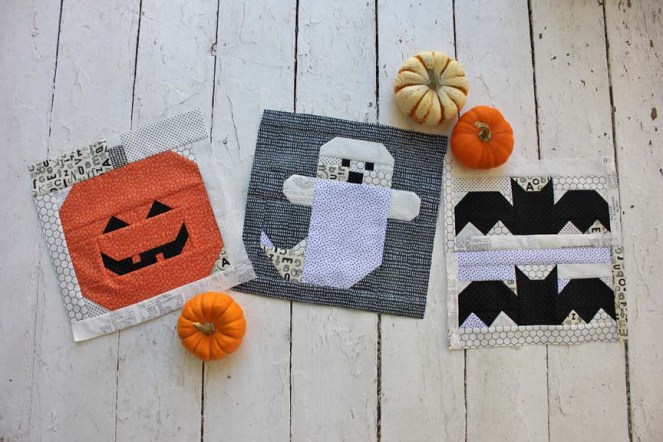
Put all three of the new quilt block tutorials together and you’ve got a fun Spooky Parade (that’s in fact not spooky at all!).
For easy reference:
Thanks for following along with my Spooky Parade quilt block tutorials! I’d love to see your own take on the Spooky Parade, so please tag photos on social media with #spookyparade and #centerstreetquilts. Happy sewing!

How kind of you to share the tutorials for your darling ghost, bats and pumpkin! Thank you so very much!
LikeLike
Thank you sew much, these are fun!
LikeLike
Thank you so very much.your tutorials help me a whole lot, very much appreciated.
LikeLike
What a cute quilt for this time of year. Love Halloween, anytime!
LikeLike
Thank you so much for sharing these Halloween quilt blocks! They are adorable and I can’t wait to make them.
LikeLike
Thank you so much for sharing the blocks. It is going to be a fun quilt to make. Again thank you.
LikeLike
These blocks were so fun and quick to sew up! I made the Jack-o’-lantern and the ghost blocks and then turned them into bags for my kids for Halloween. Thank you!
LikeLike
Working on four ghost pillows for my grandkids. Thank you! So cute!
LikeLike